You press the button. The door starts down. It stops a few inches above the floor, then jumps back up. You try again. The same thing happens.
This problem is common, and it feels random. It is not random. Your opener is doing what it was built to do. Something told it to reverse. Your job is to work out what that something is.
In most homes, the cause is simple. A sensor is out of line. A limit setting is off. A track is dirty or bent. Sometimes the opener force is set too low. Each cause has a clear sign, and most can be checked in under an hour.
This guide covers the reversal symptom only. It does not try to cover every opener problem. You will see how the auto-reverse system works, what triggers it, and how to test each part in a safe order. You will also see when it is time to stop and call a technician.
Many Central Texas homes in San Antonio, New Braunfels, and the Hill Country deal with heat, dust, and humidity all year. Those conditions affect sensors, rollers, and seals. We will point out where that matters.
The Short Answer: Why a Garage Door Reverses When Closing
A garage door reverses before touching the ground because the opener believes something is in the way. It reads a blocked beam or extra resistance and reacts. The reaction is a safety feature, not a defect.
Four causes explain most cases:
- Safety sensors are misaligned, dirty, or blocked.
- The down travel limit is set wrong, or the floor or bottom seal changes how far the door can go.
- The force setting is too sensitive for the weight of the door.
- Tracks, rollers, hinges, or springs cause the door to bind or drag.
Less common causes include loose wiring, a failing logic board, and a weak remote signal. We cover those later. First, you need to see how the system thinks.
How the Auto-Reverse System Works
Every residential opener sold in the United States must meet the UL 325 safety standard. That standard requires two separate ways to detect an obstruction. One is an electronic eye. The other is a force or motion check. If either one trips, the door must reverse.
This design protects children, pets, and cars. It also explains your problem. Two different systems can cause the same symptom, so you must test both.
Safety Sensors (Photo Eyes)
Safety sensors sit near the floor on each side of the door. One unit sends an invisible infrared beam. The other receives it. If anything breaks that beam while the door closes, the opener reverses at once.
Sensors are the first suspect when the door reverses with no contact. The door does not need to touch anything. A bumped bracket, a cobweb, or a patch of sun glare can be enough.
Travel Limits
Travel limits tell the opener where the door should stop at the top and at the bottom. The down limit sets the closed position. If it is set too far, the door pushes into the floor and the opener reads that push as an obstruction. If it is set too short, the door may stop early and not seal.
A limit problem usually shows as a reversal right when the door meets the floor. But a thick bottom seal, a dip in the slab, or a patch of dried debris can make the door meet resistance an inch early. That can look like a reversal in mid-air.
Force Settings
Force settings control how much resistance the opener accepts before it reverses. Many older units have two dials or screws, one for up force and one for down force. Newer units adjust force through a control panel or set it automatically.
If down force is too low, normal friction can look like an obstruction. A heavy wood door or an insulated steel door needs more force than a light one. A small drift in settings is enough to cause trouble.
Tracks, Rollers, and the Door Itself
The opener is the muscle, but the door, springs, tracks, and rollers do most of the work. A balanced door moves with light effort. If a track bends or a roller sticks, the opener has to push harder. It senses that extra load and may reverse.
Quick Reference: Symptoms, Likely Causes, and First Checks
Use this table to match what you see with the most likely cause. Then follow the detailed sections that come next.
| What you notice | Likely cause | First check |
|---|---|---|
| Door reverses and opener light blinks | Sensor beam broken or misaligned | Look at the LED on each sensor |
| Door reverses only when it touches the floor | Down limit set too far, or force too low | Check limit setting and bottom seal |
| Door reverses at the same spot each time | Bent track, stuck roller, or debris | Inspect track at that exact height |
| Door reverses more on hot days | Expanded parts, dry rollers, or sensor glare | Lubricate and shade the sensors |
| Door closes with the remote but not the wall button | Wiring or wall control issue | Test the wall control wire and terminals |
| Door feels heavy when lifted by hand | Spring imbalance or worn spring | Stop and call a technician |
Cause 1: Misaligned or Dirty Safety Sensors
Start here. Sensors cause more reversal complaints than any other part. They are cheap, easy to bump, and easy to check.
What to Look For
Each sensor has a small indicator light. On many LiftMaster and Chamberlain units, a steady light means the beam is aligned. A flashing or dark light means a problem. Genie and Overhead Door sensors use similar lights, but colors and patterns vary. Check your manual for your model.
Check these points:
- Both sensors point at each other and sit at the same height.
- Lenses are clean and free from dust, spider webs, and fingerprints.
- Brackets are tight and have not shifted.
- Wires are not frayed, pinched, or chewed by rodents.
How to Fix It
Wipe each lens with a soft, dry cloth. Loosen the wing nut on the bracket. Rotate the sensor until its light turns steady. Tighten the nut by hand. Then run the door through a full cycle.
If one sensor never lights up, check the wire at the terminal on the opener. A loose connection is a common cause. If the wire is damaged, replace it. Use the same gauge and keep the run neat.
Sunlight and Texas Weather
Direct sun can wash out the beam. This happens most in the early morning or late afternoon, when the sun sits low. A sensor facing west in a San Antonio summer is a good example. Heat can also loosen brackets over time.
You can shade a sensor with a short piece of PVC pipe, painted dark on the inside. Keep it short so it does not block the beam. If the problem only happens at certain times of day, glare is likely.
Cause 2: The Down Travel Limit Is Set Wrong
Limits can drift. Vibration, a recent opener replacement, or a past repair can change them. A new bottom seal can also change how the door sits on the floor.
Signs of a Bad Down Limit
A limit that is too far down makes the door push into the floor. The opener senses the push and reverses. You may see the door rock slightly or hear a hard stop before it reverses. A limit that is too short leaves a gap at the bottom. The door may stop and not reverse at all.
How to Check It
Close the door with the opener. Look at the bottom seal. It should rest lightly on the slab, with even contact. If you see a gap on one side, the floor may be uneven. If the seal looks crushed, the limit is too far.
Adjust in small steps. Many older openers use a limit screw or dial on the motor head. Turn it a quarter turn, then test. Newer units use buttons or a panel. Follow your manual for your exact model. Large changes cause new problems, so stay patient.
When the Floor Is the Problem
Garage slabs settle, crack, and slope. In parts of Central Texas, clay soil moves with wet and dry cycles. A low spot under one corner can leave the door off the floor on that side. Fixing the limit will not cure that. A thicker or tapered bottom seal can help. A technician can also reset the door level.
Cause 3: The Force Setting Is Too Low
The force setting is a balance. Too high is unsafe. Too low causes nuisance reversals. Your opener should reverse with light contact, but not on a normal, clean close.
If the door reverses on contact with nothing in the way, the force may be too low. Raise it slightly, then test. Never raise it to the maximum to hide a mechanical problem. A door that needs maximum force is telling you something is wrong with the springs, tracks, or rollers.
Many modern openers learn force during setup. If yours does, repeat the learn process. Your manual explains how. A reset after a spring repair or door replacement is often needed.
Cause 4: Tracks, Rollers, and Hinges That Bind
A door that moves with friction costs the opener extra effort. The opener reads that effort as a block. Most of the time, the cause is simple wear or dirt.
What to Inspect
Turn off the opener. Pull the red emergency release cord to disconnect the door. Lift the door by hand to waist height. Move it up and down slowly. It should feel smooth and stay in place when you let go near the halfway point.
Now look at the vertical and horizontal tracks. Check for dents, gaps, and rust. Look at each roller. Nylon rollers should spin freely. Steel rollers should not wobble. Check hinges for cracks near the screws.
Clean and Lubricate
Wipe the tracks with a clean rag. Remove dirt and old grease. Do not spray lubricant inside the track. Lubricant attracts dust and makes it worse. Apply a garage door lubricant to rollers, hinges, and the spring coils from a safe distance. Do not use heavy grease on nylon rollers.
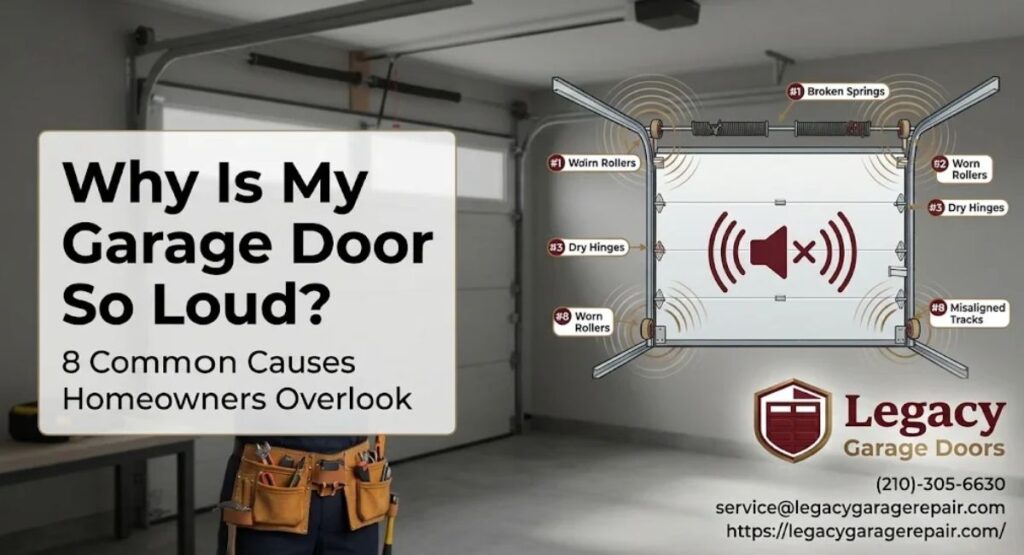
A grinding sound often goes with this problem. Our guide on why a garage door is so loud covers the noises that point to worn rollers and dry hinges.
Bent or Misaligned Tracks
Tracks must be plumb and parallel. A bump from a car or bike can push a track out of line. Even a small bend can cause the door to catch near the bottom. If you see a dent or a gap, stop. Track repair needs correct tools and care.
Cause 5: Spring Imbalance and Cable Problems
Springs carry the weight of the door. The opener only guides it. If a spring wears or loses tension, the door becomes heavy. The opener struggles, then reverses.
You can check this safely. With the door disconnected and closed, lift it by hand about three feet. Let go. A balanced door stays near that point. If it drops fast, the springs are weak. If it shoots up, the springs may be too tight.
Do not adjust springs or cables yourself. They hold very high tension. A slipped tool can cause serious injury. Call a professional for garage door spring replacement in Texas if the door fails the balance test.
Signs of spring trouble include a gap in the coil, a loud bang from the garage, and a door that sits crooked. Texas heat speeds up wear on springs that already carry many cycles. A door that opens and closes several times a day ages faster than one used twice.
Cause 6: Obstructions, Bottom Seals, and Debris
Not every cause is mechanical. Sometimes there is a small object in the path. A leaf, a pebble, a paint can lid, or a loose bottom seal can be enough.
Check the floor under the door. Look for items on the slab. Sweep the track area. Inspect the rubber seal for tears or sections that hang low. A bottom seal that has slipped out of its retainer can catch and trigger a reversal. Re-seat it or replace it.
Also check the sensor line. A garden hose, a bike tire, or a trash can near the door can break the beam. Move these items away. Keep the zone clear.
Cause 7: Wiring, Wall Control, and Remote Problems
Electrical issues are less common, but they do happen. Low-voltage wires run from the opener to the sensors and the wall control. A staple through the wire, a rodent bite, or a corroded terminal can cause odd behavior.
If the door reverses with the wall button but works with the remote, suspect the wall control or its wire. If the opener light flashes a set number of times, check the manual. Many brands use flash codes. LiftMaster and Chamberlain use the learn button LED or the wall control display. Genie units use a blink pattern. The code points to the failing part.
A weak or dying logic board can also cause false reversals. This is rare, but it is more likely after a power surge. Texas storms bring many surges. A surge protector for your opener is a small and useful addition.
Step-by-Step Troubleshooting Order
Work from simple to complex. Do not skip steps. Test the door after each step.
- Clear the area. Remove objects from the path and near the sensors.
- Clean both sensor lenses. Wipe them with a dry, soft cloth.
- Check sensor lights. Both must be steady. Realign if needed.
- Inspect the bottom seal. Look for tears, folds, and gaps.
- Disconnect the door. Lift by hand and watch for binding.
- Run the balance test. Lift to three feet and let go.
- Check the tracks and rollers. Clean and lubricate the right parts.
- Reconnect the door. Test the close cycle three times.
- Review limit and force settings. Adjust in small steps.
- Call a technician if the door still reverses or if you see spring damage.
Write down what you tried. It helps a technician diagnose the problem faster. Include the opener brand, the model number, and any flash codes.
Model-Specific Guidance
Openers differ in how they handle limits, force, and diagnostics. The model number is usually on a label on the motor head. Look up your manual before adjusting anything. The table below shows general patterns. Your model may differ.
| Opener type | Limits and force | Diagnostic hint |
|---|---|---|
| Older LiftMaster, Chamberlain, Craftsman (screw or dial models) | Limit screws and force dials on the motor head | Sensor LEDs and learn button flashes |
| Newer LiftMaster and Chamberlain (panel or app models) | Set by buttons or the control panel, often with auto force learning | Wall control display or myQ app alerts |
| Genie (screw and Intellicode models) | Limit and force dials on older units, button setup on newer ones | Blink codes on the opener light or panel |
| Overhead Door and Sommer (belt or chain) | Programmed with buttons; follow the model guide | LED sequences listed in the manual |
Craftsman openers are often made by Chamberlain, so they share many traits. Belt-drive and chain-drive units behave the same on reversal logic. The drive type changes noise and vibration, not safety rules.
Smart openers add one more step. A phone alert may tell you the door reversed and why. That message can speed up your diagnosis. Always read it before you adjust anything.
If you are unsure about your model, take a photo of the label and the motor head. A technician can identify the opener quickly. If it is old, parts may be hard to get. A newer opener may cost less than repeated repairs.
Safety Advice You Should Not Skip
Garage doors are the largest moving part in most homes. They weigh a few hundred pounds. Respect that weight. A few simple rules prevent most injuries.
- Never disable the safety sensors to make the door close. They protect people and pets.
- Never hold the wall button to force the door down against a reversal.
- Never touch springs, cables, or the bottom brackets. They carry high tension.
- Keep children and pets away during testing.
A basic reversal test is useful once your door works again. Lay a flat piece of wood, such as a 2×4, on the floor under the door. Close the door. It should reverse when it touches the board. If it does not, stop and call a professional. A door that fails this test is not safe to use.
The Door and Access Systems Manufacturers Association shares safety information on garage doors and openers. You can read more on the DASMA website for general safety guidance.
Heat, Humidity, and Seasonal Effects in Texas
Weather changes how a door behaves. Summer heat makes metal parts expand and dries out lubricant. Humidity can cause swelling in wood doors and rust on rollers. Dust blows into tracks and onto sensor lenses.
Cold snaps matter too. When temperatures drop quickly, grease stiffens and rubber seals harden. A seal that hardens in a freeze may stick to the slab and catch. Our garage door winter preparation checklist shows what to check before the cold arrives.
A short seasonal routine helps. Clean sensors, wipe tracks, check the seal, and test the reverse feature. Do it every spring and fall. It takes about twenty minutes.
When to Call a Garage Door Technician
Some jobs belong to professionals. You have done your part if you cleaned sensors, cleared the path, and checked the seal. Call for help if any of these apply:
- The door fails the balance test.
- You see a bent track, frayed cable, or gap in a spring.
- The opener keeps flashing an error after basic checks.
- The door still reverses after you adjust limits and force.
A trained technician tests the full system. That includes springs, cables, rollers, tracks, sensors, and the opener logic. This avoids the cycle of fixing one part while a second part causes the same symptom.
For opener-specific problems, our garage door opener repair service covers sensors, limits, force, wiring, and logic board checks. For mechanical problems, a Texas garage door repair visit covers tracks, rollers, and seals. If the springs are at fault, spring repair is the safer path than any home fix.
How to Prevent the Problem from Coming Back
Prevention is simple. It costs less than repeated repairs. Build a routine around these habits:
Test the reverse feature once a month. Clean sensors every few months. Keep the floor under the door clear. Lubricate moving parts twice a year. Replace worn seals before they tear. Listen for new sounds, and act on them early.
Also avoid extra weight on the door. Adding a heavy panel, a window kit, or insulation changes balance. After any change, have the springs checked. A door that was balanced for one weight may not stay balanced at another.
Common Questions About Garage Doors Reversing Before Closing
Why does my garage door reverse when it is almost closed?
The most likely causes are misaligned sensors, a down limit set too far, or a force setting that is too low. A worn seal or an uneven floor can also trigger it.
Can I turn off the auto-reverse feature?
No. It is a required safety feature, and turning it off puts people at risk. Fix the cause instead.
Why does my garage door close with the remote but not the wall button?
The wall control or its wire may be faulty. In some openers, the remote bypasses the sensor check only if you hold the button. That is a symptom of sensor trouble, so check the sensors first.
How much does it cost to fix a garage door that reverses?
It depends on the cause. A sensor adjustment is a minor job. A spring or track repair costs more. A technician can give you a clear quote after testing the system.
Is it safe to keep using the door while it reverses?
Use caution. A reversing door is still doing its safety job. But the underlying cause may worsen. Do not force the door closed. Schedule a check soon.
Final Takeaway
A garage door that reverses before touching the ground is not broken by default. It is reacting to a signal. Start with the sensors, then check limits and force. Look at tracks, rollers, and the seal. Run the balance test. Stop if you see spring or cable damage.
Most reversal problems are fixable with careful checks. Some need a trained eye. Either way, the goal is a door that closes smoothly and reverses only when it should.
If your door still reverses after these steps, contact Legacy Garage Doors for a full inspection. Our team serves homeowners across San Antonio and Central Texas. For opener issues, visit our garage door opener repair page and book a visit today.